it’s a nightmare to hear the “pop” that often comes with a pulley injury but luckily, it’s not as bad as it sounds. Depending on the severity of your pulley injury you’ll need between 6 weeks to 6 months to fully recover. If you use this recovery time well your fingers will end up stronger than before your injury.
In this article, I will show you exactly how to treat your pulley injury from start to finish. I used this approach myself after I heard a double pop in the spring of 2022. Even though I injured 2 pulley ligaments, today my fingers are stronger than ever.
The bottom line is that you’re going to be fine. So, cheer up, and let’s get down to your rehab below.
1. What is a Pulley Ligament?
A pulley ligament, or annular ligament, is a ligament that holds the flexor tendons close to the fingers. There are 5 annular ligaments in each finger except for the thumb which has 2. The pulleys each have a name according to their location, from the finger’s base to the tip. Between each set of annular ligaments, there is a cruciate ligament. Of these, you’ll find 4 in each finger whereas the thumb only has 1.
The annular ligament right above the metacarpophalangeal (MCP) joint is the A1 pulley. That one is followed by the C0 cruciate ligament, which is followed by the A2 pulley, which is followed by the C1 cruciate ligament, and so forth.

This ligament system on the front side of the finger optimizes the transfer of force of the finger flexors. It’s the reason you can bend your fingers so well. Without them, bowstringing would occur, and you’d lose both strength and range of motion in the finger joints.

The A2 and the A4 pulleys are the strongest of the pulleys because they are directly attached to the bone. The other pulleys and cruciate ligaments are connected to the connective tissue lining on the front of the digits. Together with the ligament complex, this forms a tube around the flexor tendons.
Both finger flexors, the flexor digitorum superficialis (FDS) and the profundus (FDP) pass under the A2 pulley. That’s why the A2 pulley is injured most often, it resists the highest amount of force. After the second phalanx only the flexor digitorum profundus continues, passing under the A4 and A5 pulley.

Now let’s find out what happens to your annular ligaments when you rock climb.
2. Annular Ligaments in Rock Climbers
When we climb, we load our fingers in unique ways. We drag, crimp, and pinch anything to get on top of a rock face. The smaller the hold the more stress on your finger structures.
The open grip stresses the joint capsules more because of the pulling force they must endure. The crimp position, on the other hand, stresses the pulley ligaments uniquely. Look at the image below, you see instantly how the crimp position places the most load on the A2, A3, and A4 pulleys. If they wouldn’t be there, the flexor tendon would run in a straight line from the A1 to the A5 pulley.
As this use of the fingers is otherwise uncommon in everyday life it takes a while for your fingers to adapt (if you just started rock climbing, my blog about how often you should climb as a beginner will help you optimize this adaptation process). But, if you keep on climbing regularly, the muscles and tendons of the forearm, hand, and fingers – including the pulley ligaments, get stronger. Research has shown that the pulley ligaments of experienced rock climbers show increased stiffness and more calcification. These changes might also make the sliding of the flexor tendons less smooth. This would then add friction and make it easier to hold your fingers in strenuous positions.
The pulleys resist the highest load in the eccentric phase of loading the finger. This translates to the moment you grab onto the hold and start pulling on it. A pulley ligament in the fingers of experienced rock climbers can resist up to 400N of force, which equals 40KG per pulley. That’s a lot! But what happens when your annular ligaments suddenly must resist a load above their maximum capacity? When you slip off a foothold or a hold breaks?
3. How do you Injure Your Pulley Ligament while Rock Climbing?
Pulley or annular ligament injuries are the most common rock climbing injuries, accounting for 10-20% of all injuries according to a study by Schöffl et al. The A2 pulley of the ring finger is injured most often.
There are 2 ways you can injure your pulley ligament while rock climbing, either due to an accident or to long-term overload. The former is usually the result of a slip of a foothold or a hold that breaks. Then your fingers must suddenly resist a lot more weight.
An overload injury however comes on gradually. It comes from repetitive stress to the annular ligament and is often a consequence of improper rest and recovery between climbing or training sessions.
4. How do you Know if You Injured Your Pulley Ligament?
The acute pulley injury is easiest to diagnose; you were crimping a hold and there was a foot slip or a hold that broke. If this didn’t happen, the most important thing is, that the pain started in a crimp position. Sometimes you hear a pop when you injure an annular ligament.
Right after the injury, you feel pain in your finger but not always at the front of it since the pulley ligaments attach to the side of the finger. The pain isn’t always severe and some of you wouldn’t even stop climbing because of it. Only after you finish your session, do you notice stiffness and difficulty bending your finger. There might also be swelling on the injury site. When multiple pulleys are torn there’s a chance of bowstringing, but you might not always see this by eye.
Furthermore, when you crimp you feel less sure than using an open grip while pressure on the injured pulley will cause familiar pain. With all this information you can be fairly sure you injured your pulley ligament. Still to be absolutely sure about the structure you injured you need to get it diagnosed with the aid of ultrasound imaging.
When the onset of your finger pain is slow, however, the diagnosis is a bit trickier. The fastest way would still be to get ultrasound imaging done. Because there you’ll always see which structures are injured.
As things go, tenosynovitis, an inflammation of the flexor tendon sheath, can cause similar symptoms but warrants a different treatment approach. Besides that, the finger joint capsule and the flexor tendons themselves can also cause pain and discomfort.
When you suffer from an overload injury it’s important to review your training and climbing regimen. Look at the intensity and volume of your training as well as possible factors that could affect your recovery capacity.
- Were there returning pains in the previous weeks/months?
- Have you been doing a lot of the same, like monotonous training or trying a couple of crux moves again, again, and again?
- Have you been eating, drinking, and sleeping well and enough?
- Have you been climbing infrequently?
- Have you been stressed recently?
- Are there other parts of your life that have been consuming a lot of energy?
5. How Long Does It Take for a Pulley Injury to Heal?
A pulley injury from rock climbing takes between 6 weeks and 6 months to heal entirely. This depends on the severity of the injury.
- Is a pulley injured with or without torn fibers?
- Are there multiple pulley’s injured in the same finger?
- Are there ligaments that are completely torn?
German orthopedic specialist, rock climber, and regular publisher of scientific research on rock climbers, Volkr Schöffl, has proposed grading systems for pulley injuries with 5 levels of severity. This rating scale is commonly used to decide on the right treatment.
| Grade I | Grade II | Grade III | Grade IVa | Grade IVb | |
| Annular ligament sprain | Complete tear of A3 or A4 or tear of A2 | Complete tear of A2 | Multiple tears A2-A3 or A3-A4 without clear bowstringing and physiotherapy should start <10 Day’s after the Trauma | Multiple tears A2-A3 or A3-A4 with clear bowstringing: – A2/A3/A4-Tear – single tear with FLIP Phenomenon – single tear with progressive contracture – single tear with secondary tenosynovitis that doesn’t respond to treatment | |
| Therapy | Conservative (no surgery necessary) | Conservative (no surgery necessary) | Conservative (no surgery necessary) | Conservative (no surgery necessary) but only when there’s no contracture of >20° in the PIP Joint. If this does happen, surgery is indicated. | Surgical |
| Immobilization | Not necessary | Optional, <5 day’s | Optional, <5 day’s | Optional, <5 day’s | 14 day’s post-operatively |
| Functional Therapy with Pulleyring | 2–4 weeks H-Tape (during the day) or thermoplastic ring | 6 weeks thermoplastic ring | 6–8 weeks thermoplastic ring | 8 weeks thermoplastic ring | After the immobilization period; 4 weeks thermoplastic ring |
| Full climbing possible | After 6 weeks | After 8-10 weeks | After 3 months | After 4 months | After 6 months |
| H-Tape while Climbing | 3 months | 3 months | 6 months | >12 months | >12 months |
The first thing you can see is that in almost all cases you can heal your pulley injury without surgery. Secondly, it’s going to take at least 6 weeks to return to your redpoint level. This doesn’t mean though you should just sit around waiting for this time to pass by. It’s essential that you start your rehab instantly and commit to it. This will ensure the best results because you’ll be stimulating your annular ligament to heal as strongly as possible.
Regardless of which grade your pulley injury is, in the first 2 weeks, you should always be careful. During this inflammation phase, your body prepares the injured pulley for efficient recovery. Waste products from the injury site will be transported away and building blocks for novel ligament tissue will be brought to it. During this period your pulley is still weakened, after that, it will get stronger by the week. This process you’re going to stimulate with your rehab.
Read on below how to do this exactly.
6. What is the Fastest Way to Heal an Acute Pulley Injury?
The fastest way to heal an acute pulley injury is by resting well right after you injure the ligament. If you have a level 2 injury or above, wear a thermoplastic ring (do not use tape because it blocks blood circulation) to ensure proper healing. Since ligaments need to be as tight as possible to execute their function. The thermoplastic ring ensures the annular ligament grows together tightly. After the initial unloading of the finger, you should start a progressive loading program for the injured finger while you keep training the rest of your body. As soon as you can, you should also return to climbing. At the start without loading the injured finger, then with ever more intensity by looking for specific holds to train your finger to become strong again.

With any climbing injury, or any sports injury for that matter I always keep the following sentence in mind: Rehab is training in the presence of injury. So, to get back to climbing your strongest you should never stop training, just alter it so that your injury heals optimally while losing as little strength and conditioning as possible.
So, you can still do most strength training, you can run, you can swim, and you can do pull-ups as soon as you have passed to protection phase. Before you know it you’re climbing on jugs again. And then it’s just 1 step at a time back to sending hard routes.
Here’s a progression of how to heal your acute pulley injury according to injury grade.
Important note: the weeks are indications, not goals. If you don’t fulfill the requirements to progress to the next rehab phase after the indicated time, don’t worry, every healing process is different.
6.1 Grade I Pulley Injury: Rehab Time 6 Weeks
A grade I pulley injury is a strain and not a rupture. This means there are no broken fibers, but the tissue is still injured. The rehab of a pulley strain takes around 6 weeks.
- wear thermoplastic ring continuously for 4 weeks.

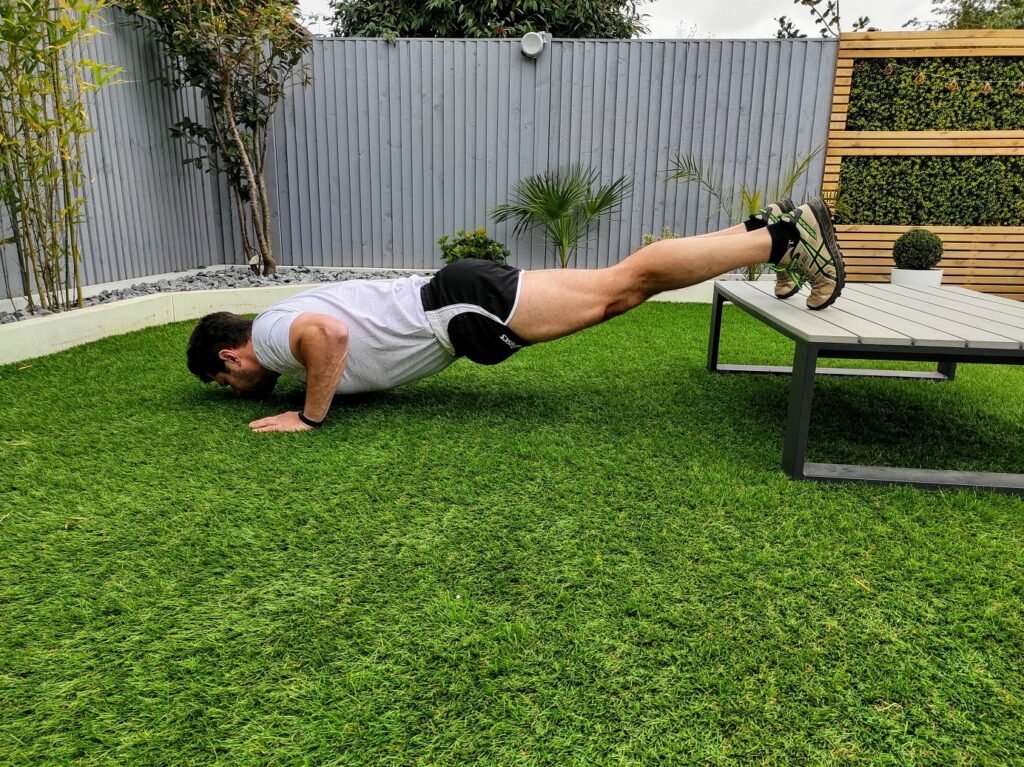
Week 1: start AROM exercises instantly. Examples are pencil rolls, tendon glides, ball squeezes, and rice grabbing. Continue training anything that doesn’t load the finger; run, hike, lift weights, or do (core) stability exercises (in all phases of your rehab).
You can continue your rehab if all signs of inflammation are gone, and you have no pain at rest.
Week 2: continue AROM exercises daily and include ball squeezes. Start rock climbing on big jugs while H-Taping the injured finger. Avoid crimping entirely. 2-3x/week 3x10sx30% intensity or pain of up to 5/10 intensity hangs on a variety of holds. The pain should subside as soon as you stop hanging.
You can progress to the next rehab phase if: your finger pain stays away at rest. After training you’re allowed to feel a (painful) reaction of up to 12 hours after training.
Week 3: continue AROM exercises daily. Start rock climbing on smaller holds with an open grip while continuing to H-Tape the injured finger. 2-3x/week 3x10sx50% or 5/10 pain intensity.
You progress to the next rehab phase if: you have no (painful) reactions to the training of more than 12 hours.
Week 4-6: continue AROM exercises until your finger feels great again. Return to crimping on the wall. Progress the grades training by training. Increase intensity on the hangboard with steps of 20%/week. Once you can load your finger maximally again switch to a hangboard protocol that suits your goals. For example, Density Hangs, Max Strength Hangs following Eva López’s Routine, or Max Hangs following Eric Hörsts Principles. Continue taping while climbing for 12 weeks.
6.2 Grade II Pulley Injury: Rehab Time 8-10 Weeks
- Wear a thermoplastic ring continuously for 6 weeks
Week 1-2: start AROM exercises instantly. Examples are pencil rolls, tendon glides, and rice grabbing, but only if you can do these exercises pain-free. If you feel pain either make the exercise light by reducing the resistance, the range of motion, or leave it out altogether. Continue training anything that doesn’t load the finger; run, hike, lift weights, or do (core) stability exercises (in all phases of your rehab).
You can continue your rehab if all signs of inflammation are gone, and you have no pain at rest.
Week 3-4: continue AROM exercises daily and include ball squeezes. Besides that, do 2-3x/week hangs with 3x10sx10-20% intensity or with a pain level of up to 3/10. Keep your feet on the floor. The pain should subside as soon as you stop hanging.
You can progress to the next rehab phase if: your finger pain stays away at rest. After training you’re not allowed to feel a (painful) reaction.
Week 5-6: continue AROM exercises daily. Start rock climbing on big jugs while H-Taping the injured finger. Avoid crimping entirely. 2-3x/week 3x10sx30% intensity or pain of up to 5/10 intensity hangs on a variety of holds. The pain should subside as soon as you stop hanging.
You can progress to the next rehab phase if: your finger pain stays away at rest. After training you’re allowed to feel a (painful) reaction of up to 12 hours after training.
Week 7-10: continue AROM exercises until your finger feels great again. Start rock climbing on smaller holds with an open grip while continuing to H-Tape the injured finger. 2-3x/week 3x10sx50% or 5/10 pain intensity.
You progress to the next rehab phase if: you have no (painful) reactions to the training of more than 12 hours.
Return to crimping on the wall. Progress the grades week by week. Increase intensity on the hangboard with steps of 10%/week. Once you can load your finger maximally again switch to a hangboard protocol that suits your goals. For example, Density Hangs, Max Strength Hangs following Eva López’s Routine, or Max Hangs following Eric Hörsts Principles. Continue taping while climbing for up to 12 weeks.
6.3 Grade III Pulley Injury: Rehab Time 3 Months
- Wear a thermoplastic ring for 6-8 weeks continuously.
Week 1-2: start AROM exercises instantly. Examples are pencil rolls, tendon glides, and rice grabbing, but only if you can do these exercises without any sharp or shooting pain. If you feel pain either make the exercise light by reducing the resistance, the range of motion, or leave it out altogether. Continue training anything that doesn’t load the finger; run, hike, lift weights, or do (core) stability exercises (in all phases of your rehab).
You can continue to the next rehab phase if all signs of inflammation are gone, and you have no pain at rest.
Week 3-4: continue AROM exercises daily and include ball squeezes. Besides that, do 2-3x/week hangs with 3x10sx10-20% intensity or with a pain level of up to 3/10. Keep your feet on the floor. The pain should subside as soon as you stop hanging.
You can progress to the next rehab phase if: your finger pain stays away at rest. After training you’re not allowed to feel a (painful) reaction.
Week 5-8: continue AROM exercises daily. Start rock climbing on big jugs while H-Taping the injured finger. Avoid crimping entirely. Hang 2-3x/week 3x10sx30% intensity or pain of up to 5/10 intensity on a variety of holds. The pain should subside as soon as you stop hanging.
You can progress to the next rehab phase if: your finger pain stays away at rest. After training you’re allowed to feel a (painful) reaction of up to 12 hours after training.
Week 8-12: continue AROM exercises until your finger feels great again. Start rock climbing on smaller holds with an open grip while continuing to H-Tape the injured finger. Hang 2-3x/week 3x10s with at most a 5/10 pain intensity.
You can progress to the next rehab phase if you have no (painful) reactions to the training of more than 12 hours.
Return to crimping on the wall. Progress the grades week by week. Increase intensity on the hangboard with steps of 10%/week. Once you can load your finger maximally again switch to a hangboard protocol that suits your goals. For example, Density Hangs, Max Strength Hangs following Eva López’s Routine, or Max Hangs following Eric Hörsts Principles. Continue H-taping while climbing up to 6 months post-injury.
6.4 Grade IV Pulley Injury: Rehab Time 4-6 Months
- If you did do surgery; wear a thermoplastic ring for 4 weeks after the immobilization period or as specified by the orthopedic specialist.
- If you didn’t do surgery; wear a thermoplastic ring for 8 weeks.
Week 1-2 Post-Surgery: follow the directions of the orthopedic specialist.
Week 1, up to day 5 without surgery: rest and only move your finger passively with PROM exercises.
End of week 1-4: Start AROM exercises. Examples are pencil rolls, tendon glides, and rice grabbing, but only if you can do these exercises without any sharp or shooting pain. If you feel pain either make the exercise light by reducing the resistance, the range of motion, or leave it out altogether. Continue training anything that doesn’t load the finger; run, hike, lift weights, or do (core) stability exercises (in all phases of your rehab).
You can continue to the next rehab phase if all signs of inflammation are gone, and you have no pain at rest.
Week 5-8: continue AROM exercises daily. Hang 2-3x/week 3x10sx20% intensity or pain of up to 3/10 intensity on a variety of holds. The pain should subside as soon as you stop hanging.
You can progress to the next rehab phase if your finger pain stays away at rest. After training you’re allowed to feel a (painful) reaction of up to 12 hours after training.
Week 9-12: Start rock climbing on big jugs while H-Taping the injured finger. Avoid crimping entirely. Hang 2-3x/week 3x10sx30-40% intensity or pain of up to 5/10 intensity on a variety of holds. The pain should subside as soon as you stop hanging.
You can progress to the next rehab phase if: your finger pain stays away at rest. After training you’re allowed to feel a (painful) reaction of up to 12 hours after training.
3-6 Months: continue AROM exercises until your finger feels great again. Start rock climbing on smaller holds with an open grip while continuing to H-Tape the injured finger. Hang 2-3x/week 3x10s with at most a 5/10 pain intensity.
You can progress to the next rehab phase if you have no (painful) reactions to the training of more than 12 hours.
Return to crimping on the wall. Progress the grades week by week. Increase intensity on the hangboard with steps of 10%/week. Once you can load your finger maximally again switch to a hangboard protocol that suits your goals. For example, Density Hangs, Max Strength Hangs following Eva López’s Routine, or Max Hangs following Eric Hörsts Principles. Continue H-taping while climbing up to 6 months post-injury.
7. What is the Fastest Way to Heal a Chronic Overload Pulley Injury?
A chronic overload pulley injury results in a painful pulley without an acute incident. There might or might not be tissue damage. The first thing you should do is get in touch with an orthopedic specialist or a physical therapist who can do an ultrasound imaging of your finger. As I mentioned before, a chronic overload injury of the annular ligament can also be a tenosynovitis of the finger flexor tendon and should therefore be excluded.
If you discover with ultrasound imaging that a pulley is damaged, you’ll know the severity too. Use this information to grade your injury and read the right chapter above for the right approach to your rehabilitation.
If there’s no damage to be seen on the ultrasound you might still be experiencing the consequences of an overload to the annular ligament. I will discuss how to treat this in a later blog about how to deal with painful fingers from rock climbing.
8. What is the Best Way to Prevent a Pulley Injury from Rock Climbing?
The best way to prevent a pulley injury from rock climbing is by periodizing your training plan so that you train intensely frequently while you allow for enough recovery time. Besides that, you should do antagonist training to prevent muscle imbalances. In the meantime, you should be on the lookout for returning pains and figure out their origin so that you can treat them accordingly. You should never train through pain and you should back off from anything that feels tweaky to any of your (finger) joints.
Furthermore, here are a couple of training principles that you can use to your advantage:
- If you want to perform at a high level, you need to train at a high level
- When you want to perform, you should train less. So, when you enter a projecting phase, you should keep training intensely but reduce the volume to anywhere between 25-50% of what you would normally do.
- Training effects assimilate over time, so if you’re not fit for a training or climbing session, let it be. Live to fight another day. Think long-term. A break today might mean a stronger session next week. On the other hand, forcing it today might start a vicious cycle of overtraining and increase the risk of injury.
- Stretching exercises, mobility exercises, and antagonist training are ways to compensate for the heavy pulling you do while rock climbing.
- After an intense training period of 2-5 weeks, include a week of recovery wherein you reduce your training volume and frequency so your body can adapt to a higher level.
- As you train microtraumas accumulate. Take at least a complete break from climbing and training once a year. Somewhere between 2-4 weeks depending on how hard you train. And then be sure to read my blog about how to return to climbing after a break.